Innovation Session: Recycling A Broken Surfboard
Her name was Cecilia. I bought her used from Stewart’s boardshop in San Clemente, CA on March 29th, 2010. A 10’6″ Regal model, custom shaped by the legendary Bill Stewart for another surfer. Ding repairs and yellowing spots showed the board’s age. It had clearly been well used by it’s previous owner. A good surfboard deserves no less.
A diamond in the rough when I found it, there were a few dings on the rails, but nothing I couldn’t fix. She ended up being a great board and together we enjoyed many of Southern California’s best longboarding spots.

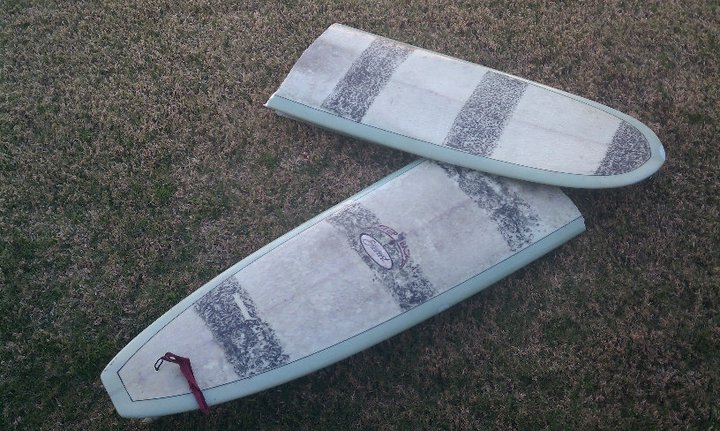
In 2011, while surfing Huntington Cliffs, I stayed on the nose a bit too long and had to bail in the shore break. I dove off at the last second as the wave closed around me. When I rose to the surface I was staring at the rear half of my favorite longboard. It was still attached to my leg via the leash. The front half had washed onto shore.
What do you do with a broken surfboard?
There are only a few things you can do with a broken longboard.
- Try to put it back together. This option almost never works – the structural integrity is shot once a board snaps.
- Turn it into a decoration. Certainly a great way to add some style to a yard or dull room. Especially if you use it as a canvas for art like Amanda from reSURFace does.
- Send it to the landfill.
- Have RERIP pick it up & turn it into cement filler for a construction project.
- Try to salvage some part of it to create another wave riding device.
I’m going with option five.
One popular option is to turn the old board into a handplane like the guys over at Enjoy Handplanes do. I think I can actually get a board out of what I have left though. Lets do some quick math.
Measuring Foam Under Foot
The limiting variable in determining what type of wave riding device I can create is the amount of foam available. For those new to this; a surfbaord is basically a hunk of foam that is coated in a hard fiberglass shell. The foam provides floatation and defines the shape. The finer points of surfboard shaping theory will have to wait for another time, but basically, the more foam you start with the more options you have.
Based on my wight, fitness & skill, the minimum amount of foam I need in a board is somewhere around 25 liters. My smallest shortboard has about 27 liters and I have some hybrids in the 40 liter range. My shortest board is actually a 5’6″ Stewart Fartknocker that has around 32 liters of foam in it.
Cecila was 10’6″ and likely came in at around 85-90 liters. She broke nearly in half, so I’m guessing that the front piece has about 40 liters to it. So with some rough math, this seems at least possible.
The Mini Simmons
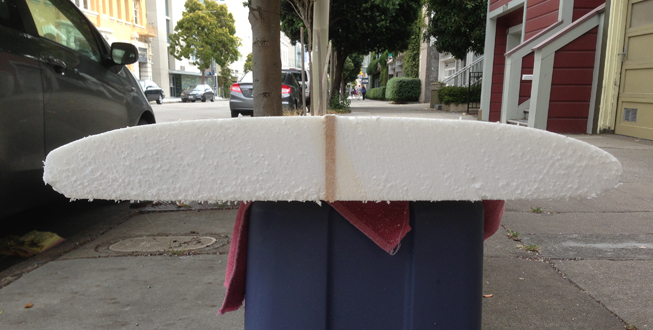
The type of board I’m going to attempt to shape is called a mini simmons. Inspired by the late Bob Simmons of La Jolla, California, these surfboards are known for their wide tails, low rocker and two low profile fins placed really far back. It is probably the perfect board to make out of a broken longboard, looking at the image below you’ll see it looks almost exactly like the front half of one.
Mini simmons are great boards for small waves. They tend to catch waves easier than a shortboard but maneuver more than a longboard. They are especially popular in places where the surf is inconsistent or mushy. Basically So-Cal. I’ve wanted to make one for a while and this seems like the perfect chance.
Thinking about templates, I’m hoping to have something that looks like the following image. Inspiration courtesy of MiniSimmonsSurfboards.com.
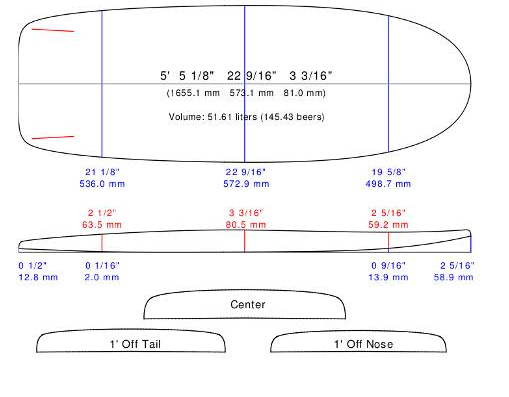
I might make a few small tweaks though, I like the look of mini simmons when the rails shoot straight off the back so I’ll probably have something closer to a 95 or 100 degree angle there. I am also fairly limited by the thickness I am starting with, so my foil won’t be perfect, I’ll have to give it a little kick in the back though as right now that is where the foam is thickest.
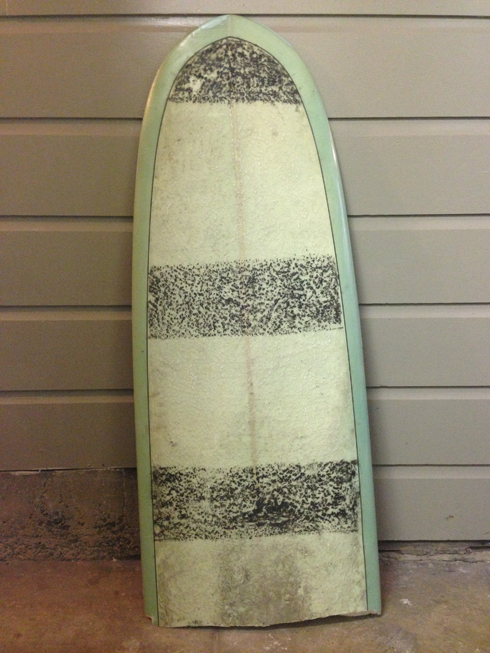
The Tear Down
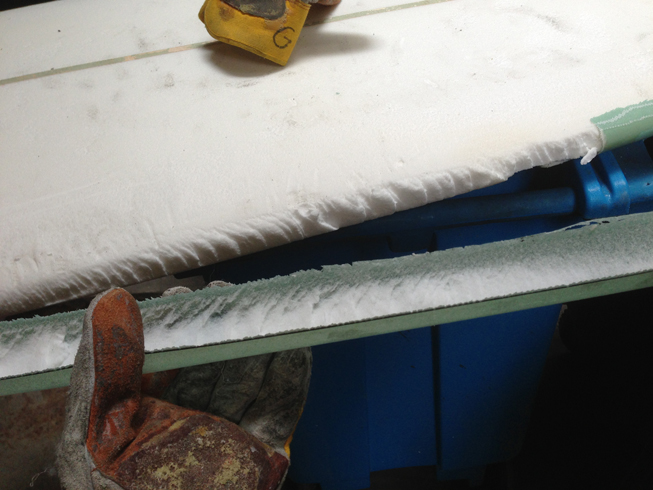
Looking at what I have now, if I want to do anything different I’m going to have to start by getting rid of the old fiberglass shell. Fiberglass is extremely sharp, so we’re exercising caution here and using gloves, goggles & a particle mask.
The fiberglass peeled off nicely from the bottom. I was able to grab strips and just tear it off. There was hardly any affect to the foam.
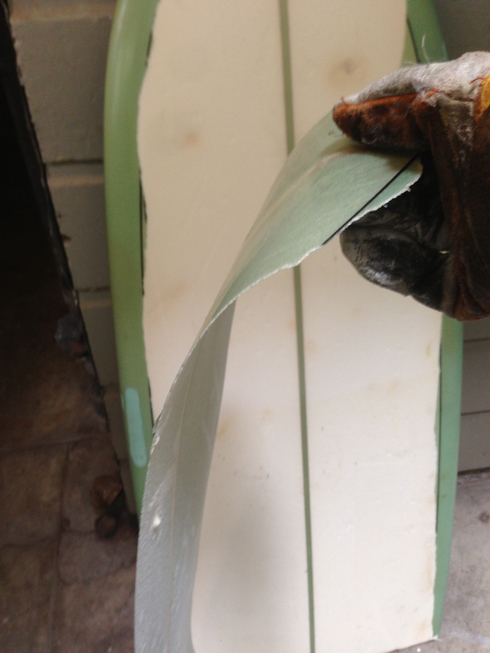
The rails were another story. When I tried to get some leverage, the whole rail ended up coming off and it shredded the foam leaving a bit inside the fiberglass shell. Still, not too bad.
The next problem is something I didn’t account for; ding repairs. I mentioned earlier that when I got the board I had to fix a few dings. Well the material I use to repair a ding isn’t exactly the same as surfboard foam and I don’t think it would shape very well. So I removed those chunks leaving me with something that looks like a sharknado had attacked it.
My two options now are to shape around it and fill them in at the end or to take the board in a bit so the rails aren’t there.
When the board snapped, the break was pretty clean but it wasn’t perfect. I made a clean cut so I would have a base to work with. As I did so I revealed Bill Stewart’s masterful 60/40 rails.
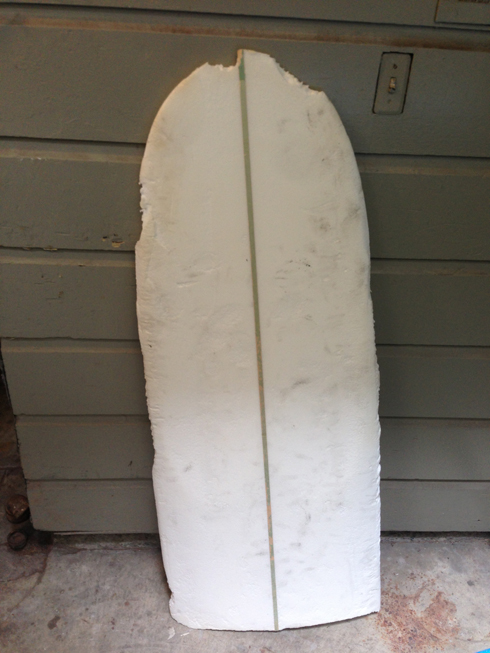
I decided to take the surfboard down a bit so I could start fresh with new rails. I didn’t want to have to deal with all of the slopiness left behind from the tear down & former ding repair spots. Because of that the biggest board I’m going to be able to get out of this is likely land around 4’3″ x 18.5″. Much smaller than the 5’5″x 22.5″ in the example. Some rough math puts our volume down at about 35 liters now. Not perfect, but still ridable.
Here is the raw foam after taking the rails down a bit. Notice that part of one of the dings is still there. I wasn’t able to get rid of that, I’ll probably have to shape around it and repair it later.

And here it is after a bit of polishing. Still needs a little work up front, making symmetrical boards has never been my expertise.

Things remaining:
- Tweak the foil (thickness)
- Finish the rails
- Figure out the fin situation
- Design the graphics
- Take it to get glassed
This was part 1 of a 4 part series – you can read the rest here:
Thanks for the post Greg. I “inherited” a snapped 10′ from a guy on Craigslist and working on a similar project. Will probably turn the snapped board into an egg since I have more foam to work with …