Create With My Hands: Update 1
Back in January I set a goal for the year to create things with my hands. A quarter through the year I had yet to do anything – not a result I am happy with.
So, to correct this, on Sunday I set out to get some supplies and started three new projects, two of which I completed and will share here.
Problem One: Wet Surfing Gloves
I am a So-Cal surfer and always will be. My hands go numb after about an hour in 55*F water. I currently live in San Francisco, which means I have to wear 3mm neoprene gloves for about half of the year. Getting them dry is a pain because they have to be upright – the outer shell of the gloves is somewhat water tight and the inside is a fleece-like lining that absorbs water.
Here is how I solved my wet surfing glove problem.
Requirements:
- Hold two sets of gloves upright to dry
- Be freestanding & stable enough that it doesn’t fall over
- Fit inside a Rubermaid tub for storage & possibly indoor drying someday
- Under $15
For supplies, I bought an 10′ length of 1/2″ pvc, a few pvc joints and some pipe cement. I already had a saw and sand paper. Total cost $7.55 + tax.

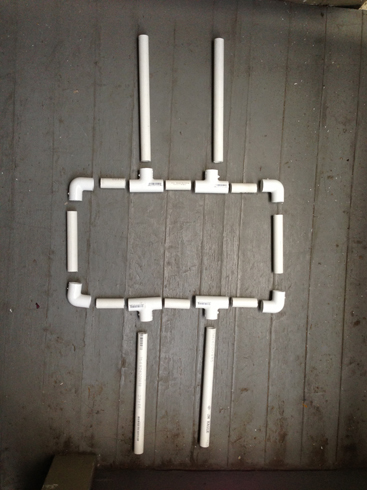
My plan was to have a rectangular base with the four glove holders sticking straight up. Here is a 2D version of the plan.
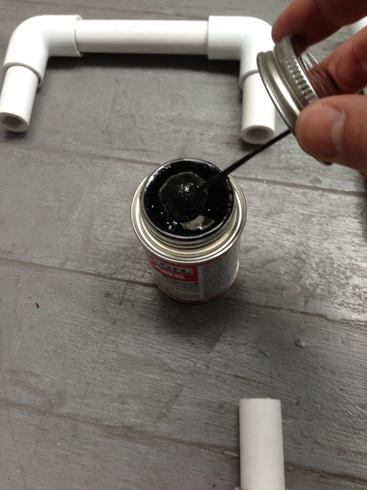
The pipe cement I bought came with a brush in the cap, which makes things easy. I had a ton of cement left and only used about half of the 10′ pvc pipe – so the next project only requires joints. Making two of these could get costs down around $5 a pop.
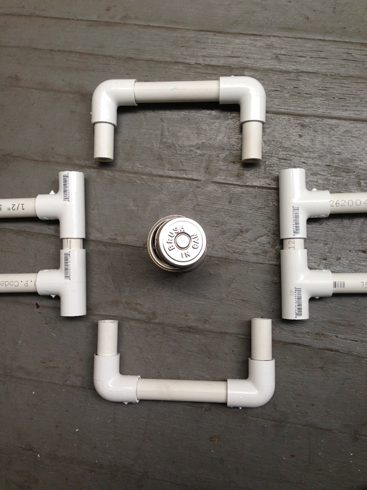
Half way assembled. To make sure everything was straight, I started with segments that were 2D and made sure they were straight on a piece of wood.
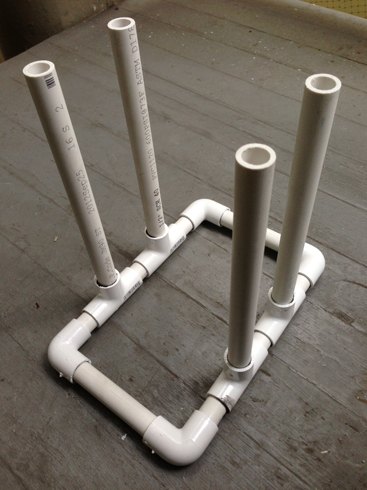
Finally, I brought everything together and made sure the glove holders were at a 90* angle.
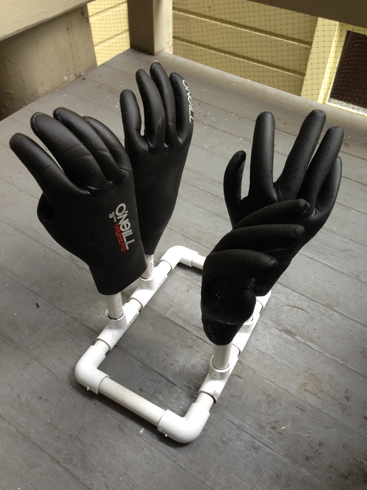
Here it is with two sets of gloves, drying like a boss.
Project Two: Better Access To My Tool Box
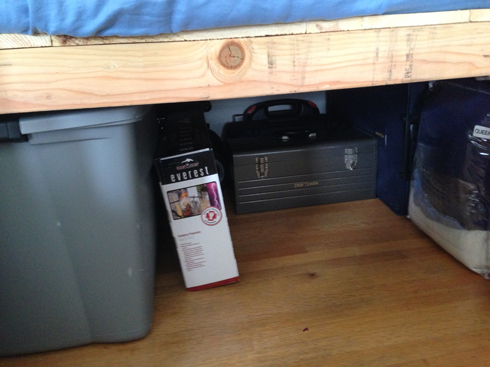
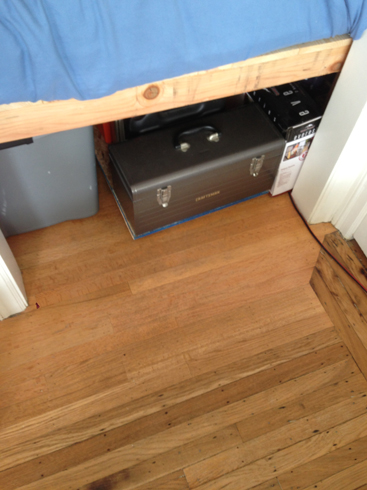
Part of the reason I haven’t been working with my hands very much is that my tools are a bit hard to get to. Right now I’m living in a studio with my wife so space is at a premium. I built a bed with storage underneath it last year – which works out great for the large tubs of surfing and camping gear we keep under there (not to mention various lifetime supplies of things from Costco). My tool box, however, is metal and would scratch the floor if I dragged it, so I try and lift it out of its place. Life Lesson: It is incredibly hard to reach under a bed for a 50lb toolbox and then try and lift it and bring it out – especially if you have a shoulder injury.
I want to make it a bit easier to get to my tools, so I’m going to put some wheels on them. I thought of buying a toolbox dolly, but this seems like a problem I can solve by hand. That is always more fun.
Requirements:
- Rolling platform for all of my tools
- Must support ~50-60lbs
- Limited to 20″ wide and ~2′ deep
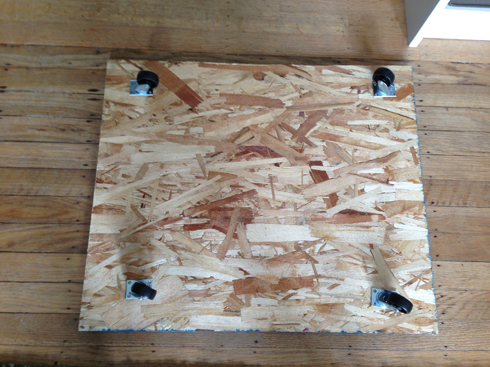
This one was an easy fix, but it feels great to have it done. I got some scrap particle wood and cut two sheets of 20″ x 24″ and picked up a set of castors (wheels that spin). A few screws and it’s done.

It doesn’t roll perfectly, but it is much better than before. The best part about making something by hand like this is that I can always cut it smaller or get a new sheet of wood if my size requirements change in the future.
So, despite a bumpy start to the year, I feel like I’m back in the groove, ready to create some cool things with my hands. The next one I’m working on is a fun one, stay tuned…