Innovation Session: Recycling A Broken Surfboard – Part 3
This is part 3 of a 4 part series – you can read the rest here:
- Recycling A Broken Surfboard – Part 1
- Recycling A Broken Surfboard – Part 2
- Recycling A Broken Surfboard – Part 4
Continuing where I left off. Previously I stripped down the old broken board, shaped the foam into something new & now I’m ready to put the finishing touches on my recycled surfboard.
Surfboard artwork has always been a place for expression an individuality. From back when islanders would carve artwork into their giant wooden plans, to the pre-war era surfboards with paint to contemporary sticks graffitid with spray paint and Sharpie.
How a board looks shouldn’t affect how it rides – but I defend that it does. So much of how a session goes is built on momentum that the good vibes from the parking lot compliment to a paddle out conversation can all contribute to which waves a surfer paddles for and how they ride them.
I love having surfboards the get me stoked. Sometimes that is classic gems from another era I’ve refurbished. Sometimes it is bold colors. For this board I’m feeling excitable.
Inspiration
When I think about the surfboard I have in front of me I realize that it transcends decades.
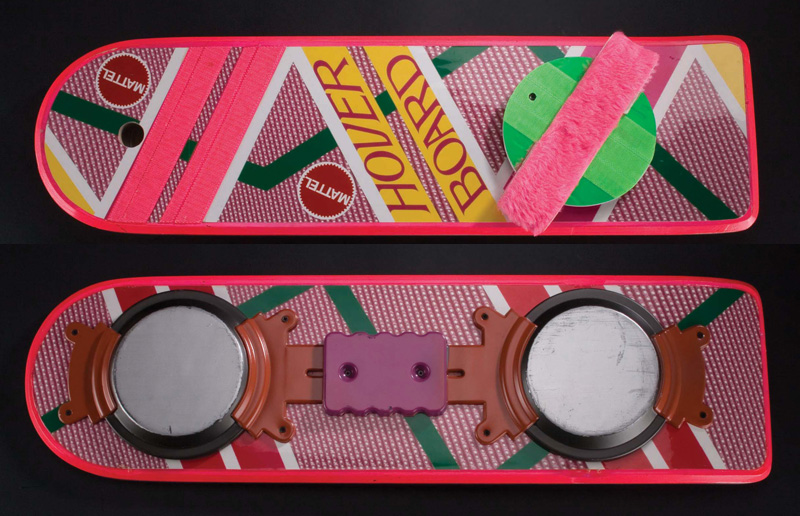
Originally shaped in the 2000’s by Bill Stewart, a shaper & artist who’s work brought him fame in the 1980’s and who created the gift surfboard that was presented to Mikhail Gorbachev to celebrate the end of the Cold War in 1990.
The new shape is a Mini Simmons, a contemporary design modeled after the shaping principles of Bob Simmons who innovated in late 1940’s and 1950’s.
This foam tells a story 70+ years in the making.
Nothing is more appropriate to inspire the artwork on this new board than another board who’s story spanned 70+ years.
I am of course talking about the bright pink Hover Board of Back to the Future: Part II fame.
Looking at my rails, the shape isn’t too far off either. Lets get to work.
Taping & Painting
I’m using acrylic paint to do the artwork. I’ve used it before to color match ding repairs but I’ve never done a whole board. I’ve been warned that if there is too much paint, the glass won’t stick to the foam and the board will be ruined.
Traditionally, most boards are either airbrushed with color or pigment is added to the glass. I am hand painting this though so I’m going to dilute the paint with water to get a pretty light stain.
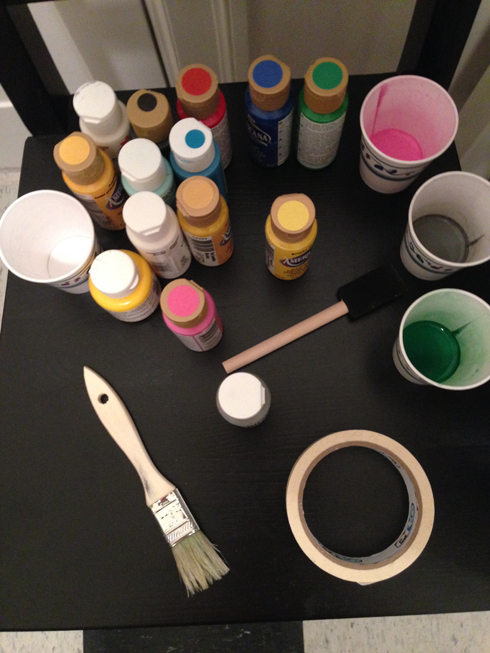
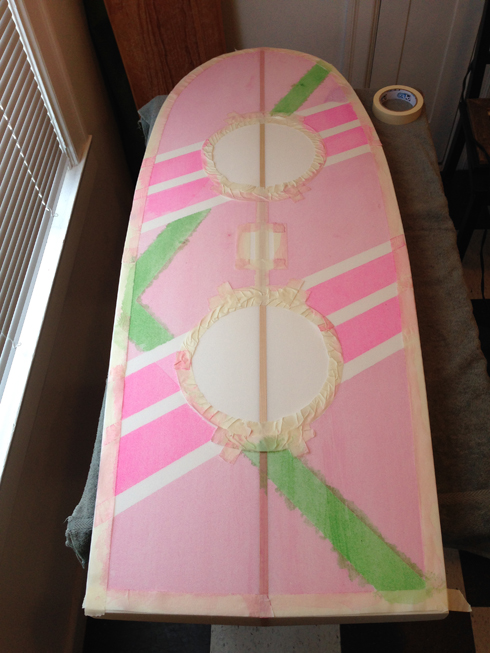
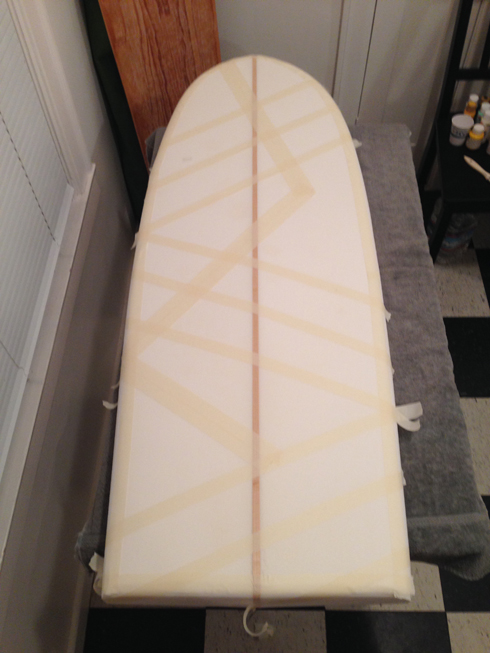
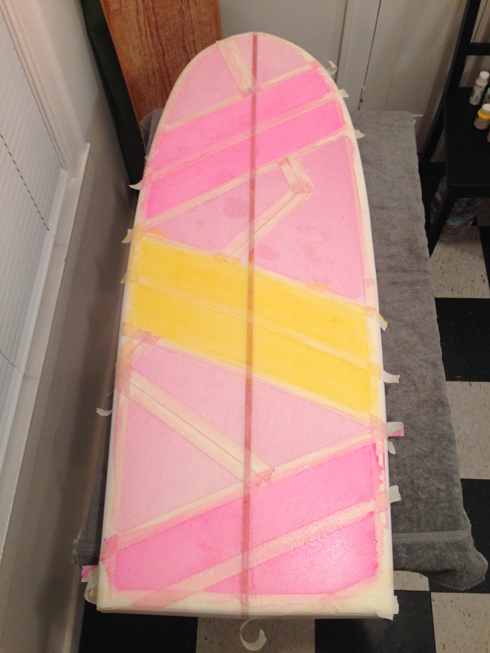
The first step is taping everything. Where the tape is, paint will not go, so I can create nice borders.
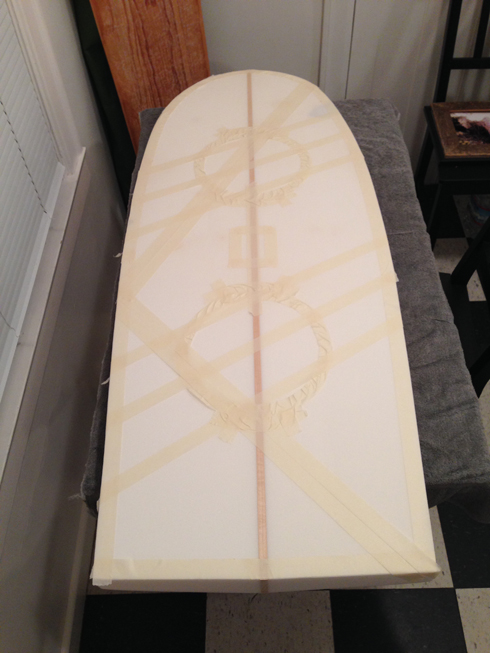
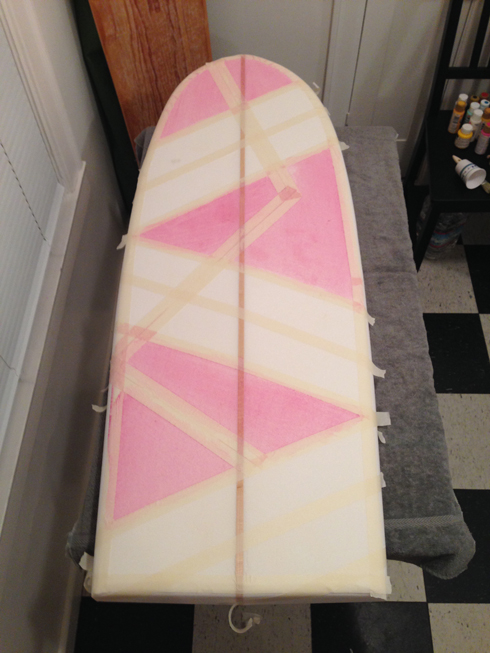
I’ve decided to take a few artistic liberties. The first one is the background color of the board. The ‘read’ one has a texture, which I don’t feel like doing, so I’m going to go for an average color of that section. It is notably darker as less bold than the pink in the stripes so I’ve mixed in a bit of grey.

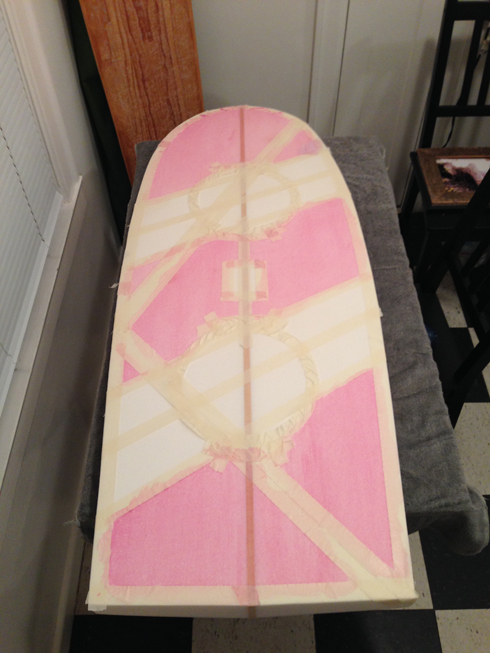
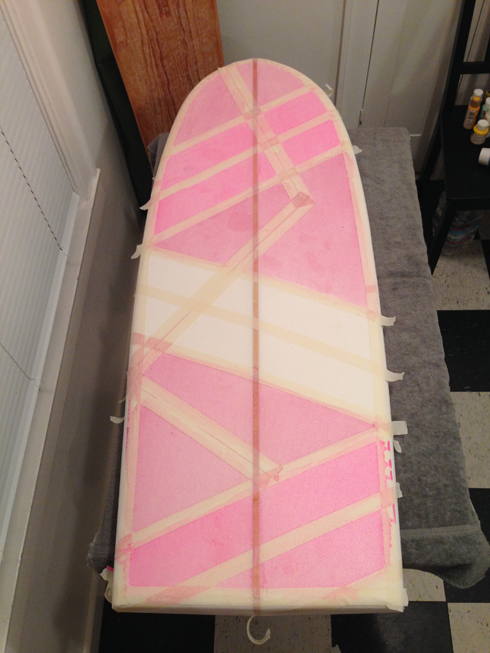
You can see the pinks are slightly different. A second coat should help even more.

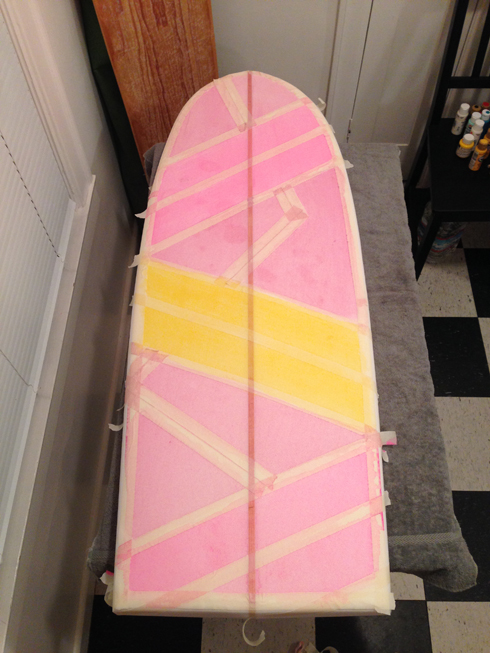
Here I peeled some of the initial tape and created new borders to paint the Green.
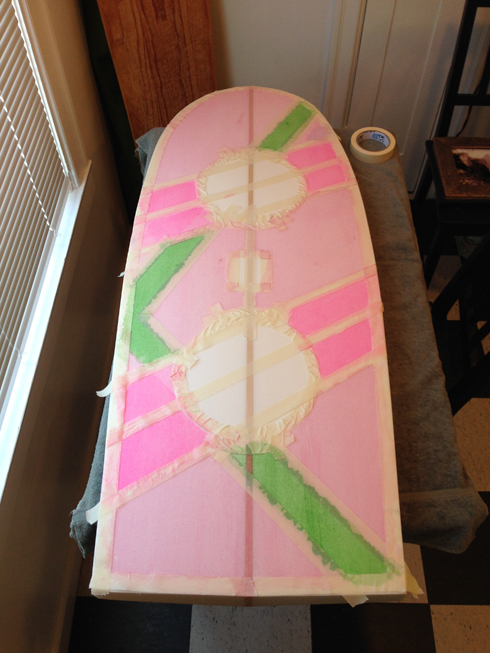
Unfortunately, I painted the green before the pink had fully dried so it bled a bit. Notice how clean the lines are where pink is bordered by white – the tape really keeps the paint out.
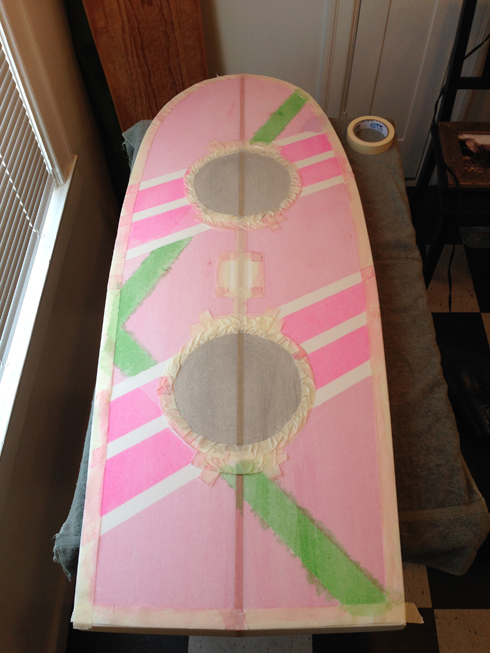
I didn’t want the black to bleed everywhere so I painted using a sponge instead of a brush. It actually worked pretty darn well though the color isn’t as quite as flat across the space and the lines aren’t as clean.
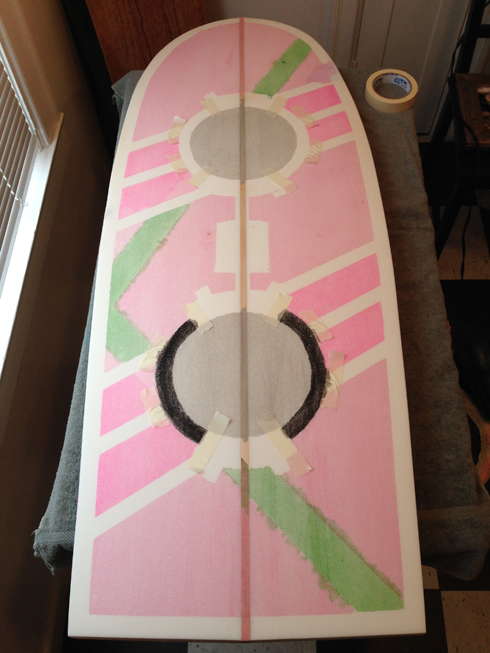
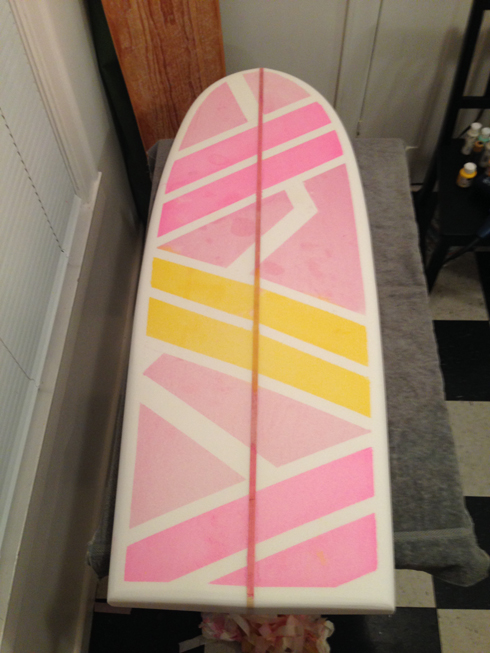
Here is the finished bottom.
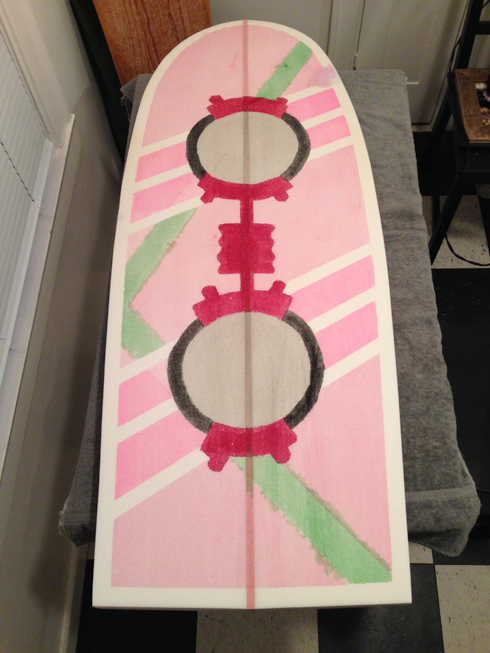
Another area of artistic liberty. The top of the movie prop had some additional items including a Mattel logo & foot hold. I don’t care too much about those and like the flat design of the colors a bit more. I think the magnetic plates on the bottom are essential to sell the story, but the top details aren’t.
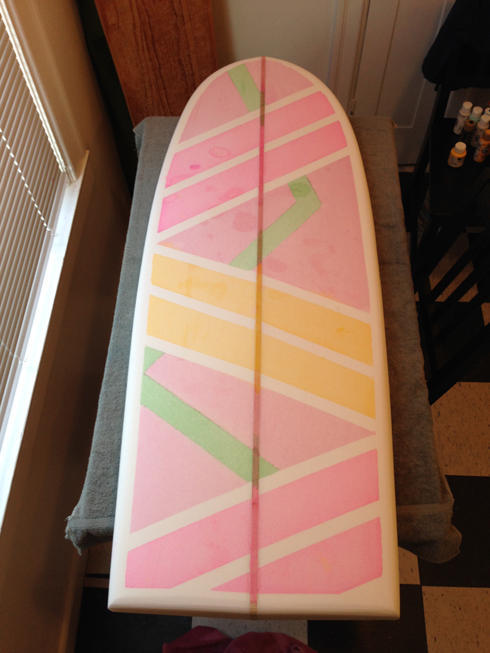
The final steps from my part are writing Hover Board in the yellow space & deciding what to do with the rails. The prop board had pink rails, but there is already a lot of pink on this board. I’m debating using the green or even leaving it white.
I’ll take the board to get glassed by a professional – glassing isn’t my favorite – it’s messy, toxic and mistakes are disastrous – that is one part I’d rather delegate.
This is part 3 of a 4 part series – you can read the rest here:
Did you ever finish it?
I did, I need to do a part 4 & review the board.