Complete an Ironman: Update 9 – Gettin’ Aero Wit It
This is one of 14 updates about my 2014 challenge to complete an Ironman – you can see a list of the others here.
On your mark ready set let’s go
Ironman pro I know you know
I go psycho when my new bike hit
Just can’t sit
Gotta get aero wit it
[Chorus:]
Na na na na na na na nana
Na na na na nana
Gettin’ aero wit it
[Repeat 3x]
-Will Smith (sort of)
I am one week out from my Ironman. My training is done. This final week is all about resting my body & mentally preparing for the race. There is almost nothing I can do to help improve my performance next weekend.
Almost nothing.
The one trick I have left up my sleeve is becoming more aerodynamic on the bike. Today we’re going to talk about that.
But first, a training update.
Training Data
Nine months. 3,176 Miles. 357.5 hour of training. Hundreds of hours of reading books, articles & blogs.
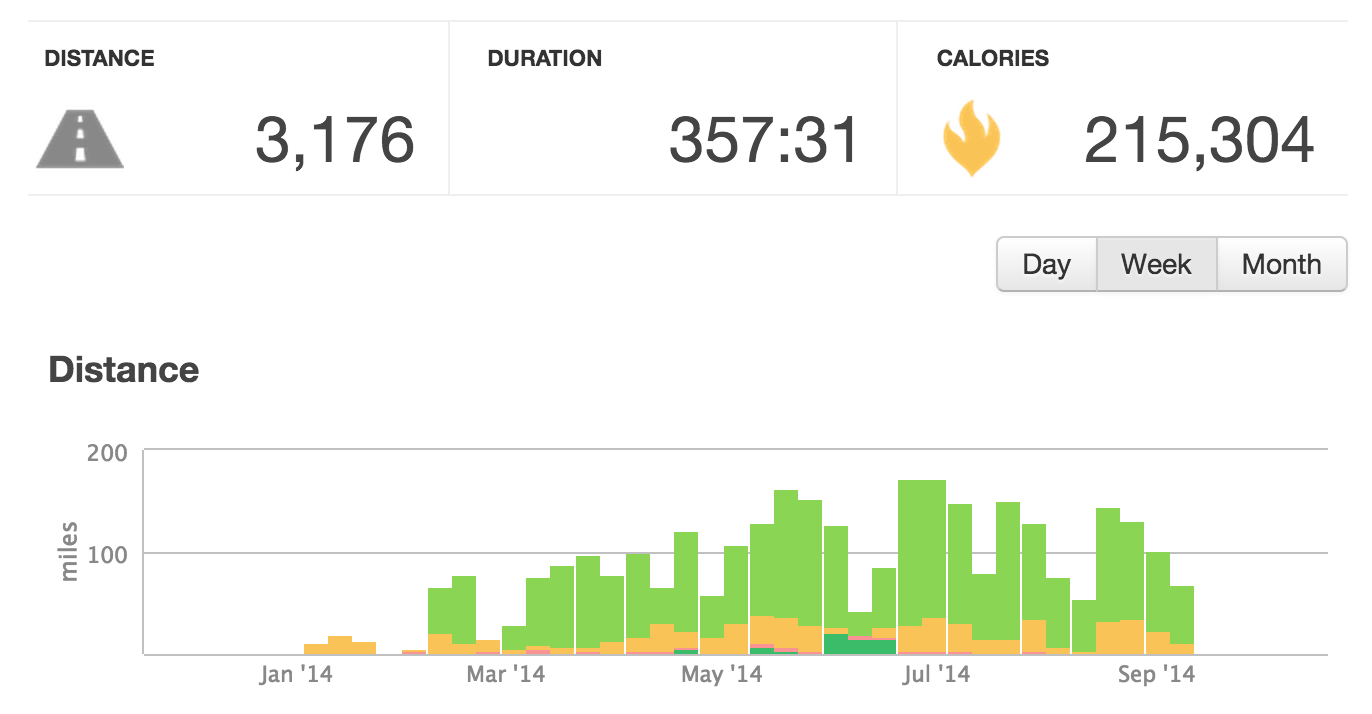
You can see that over the past month my miles have been slowly decreasing. This is part of the plan. It is called a taper. Essentially I am resting my body so it is prepared for the race. During the season, when my weeks are full of long rides and hard workouts, my body is in a constant state of stress. If I raced during that time, I would be racing tired. The idea behind tapering is to leverage the benefit of that stress but to be fresh on race day.
My taper was simple in the weeks leading up to the race my volume was set to: 75%, 60%, 40% & 20% from my maximum. I also dropped my quality workouts from four a week down to three, two and eventually zero.
My body feels full of energy. I have to be smart when working out to take it easy, I have enough energy to go much faster, but that isn’t my goal for this week. That is my goal for race day.
Gettin Aero Wit It
Why worry about aerodynamics? Let me set a scene.
Imagine that I put an engine on my bike that outputted a constant amount of energy – say 200 watts. If I started at a standstill and turned on the engine, the bike would start accelerating forward. But after a time, it would eventually hit a max speed. Lets imagine this happens at 20 mph, giving us a bike time of 5 hours 36 minutes.
Why would it hit a max speed? Well, eventually the forces working to slow the bike and the forces working to accelerate the bike will cancel each other out. At that point we reach our equilibrium.
We already stated that the forces accelerating the bike were coming from the engine. But what forces are slowing the bike?
There are four that we worry about:
- Friction – which comes from the mechanical parts of the bike such as the spinning of the wheels.
- Rolling resistance – which comes from the contact between the road and the tires
- Gravity – which comes from segments of the ride where our elevation is increasing or decreasing (can be an accelerant – going down hill)
- Wind resistance (drag) – which comes from my bike/body trying to move through the air faster than it can get out of the way
So since we already know the maximum output of our engine is 200 watts, the only way to make the bike go faster is to decrease the resistance. Even if we can decrease that resistance by 10%, that decrease will allow us to go a bit faster before the acceleration forces and resistance forces once again cancel out. This time that might happen at something like 21 mph, which would give us a bike time of 5 hours 20 minutes. A 16 minute savings without changing our engine. I’ll take it.
How to Reduce Resistance
Friction is something we minimize by using quality bike parts that are well maintained. From what I’ve read, the difference between decent parts and the best parts is negligible.
Rolling resistance is something we minimize by using slick racing tires that are inflated to a high pressure. Since my training tires had started to wear down – which increases the chance of a flat tire – I recently installed some Continental Grand Prix 4000s tires.
Gravity is something we minimize the impact of by having a lighter bike, body and supply set. This one only really matters when a lot of hill climbing is involved. On a flat course, once the bike is traveling at max speed, the momentum of the weight carries it forward, meaning it isn’t significantly harder to keep a 15lb or 18lb bike in motion on a flat course. On the down hills, weight is actually our friend, but I haven’t heard of anyone stashing dumbbells at the top of a hill just to get an advantage.
[Aside – I’d like to mention here that a top of the line bike comes in at around 15lbs. In fact, in most races you aren’t legally allowed to use a lighter bike for safety reasons. A decent bike might be 18-20lbs. There are a lot of people that are happy spending $5k to save that 3-5lbs. Now let me remind you that the impact of gravity is affected by the entire weight you’re carrying, which usually includes a 150-180lb person. If gravity is really a force you want to fight against – a few sit-ups per day is probably your best bet.]
How do we minimize wind resistance? Oh, the ways. There are so many products available for purchase that ‘make you more aero’ that it would be easy to spend $10,000. I’m not a fan of that strategy, nor a believer of most of the shoddy science, so lets talk about how we can decrease wind resistance in the most economical ways.
Body Position
This is by far the best way to save yourself time on the bike course. Apparently your body is responsible for 70-80% of the wind resistance you encounter while biking.
Tri-specific and time trial bikes are designed to put you in an aerodynamic position where you are leaning over your handle bars. This position is less comfortable, but much more efficient at cutting through the air.
Touring bikes and even racing bikes like what you see in the Tour de France don’t put riders in that position because of one very specific reason – they allow riders to draft behind each other.
Ironman races however, like most sanctioned triathlons, are noted as an individual sport and as such don’t let you draft behind others. Because of that, you need to be efficient on your own. Below are some shots of me adjusting my body position with the help of some clip-on aero bars and a new seat post.
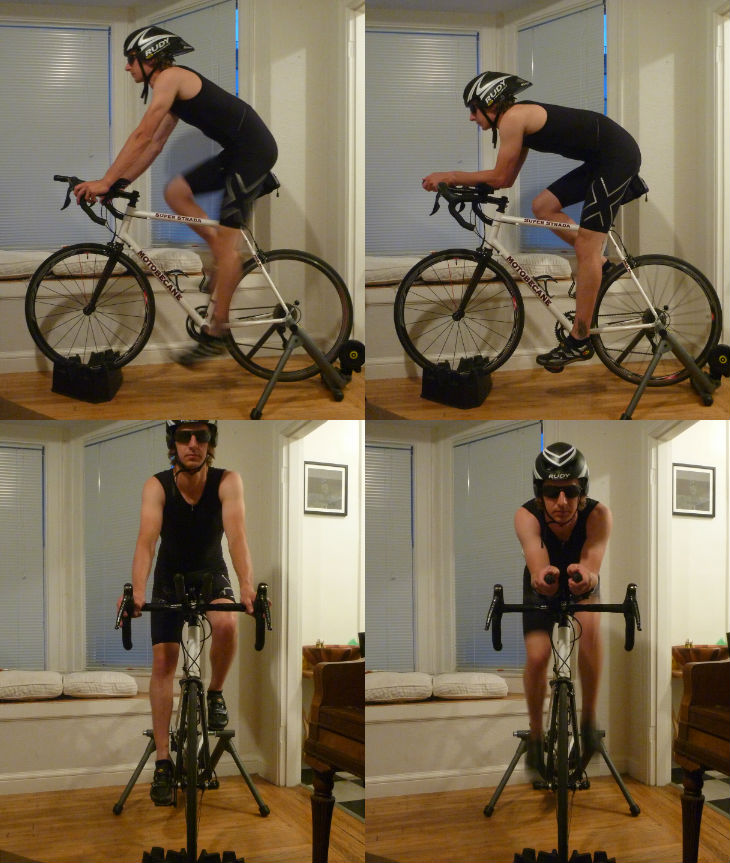
In the top pictures you can see that instead of my chest acting like a giant wind block, in the new position it is almost completely horizontal. In the lower pictures you’ll see that my head didn’t even fit in the first frame and I clearly take up a lot less space in the second frame. You might also notice how my hands and arms cut into the wind and then direct it outwards, away from my body. This is great for aerodynamics.
These pictures were from back in May. Since then I’ve made a few small tweaks, but the overall form remains very similar.
The trade off you deal with when changing your body position is speed vs. comfort. If all we cared about was aero, we might be riding something that looks like this. But aside from the fact that it isn’t legal for safety reasons, I sure would not want to be in that position for five+ hours.

Photo: Modern Mechanix
Clothing
The next aspect of aerodynamics is reducing loose clothing.
Loose clothing will inevitably flap in the wind. That flapping is you losing speed. It is basically like having a giant sail pointed in the wrong direction. By having tight fitting clothing, you allow yourself to cut quickly through the air.
Some materials are actually better at this than others. Time trial racers use special lycra suits designed to have very little friction with the air. These suits are great for short sprints, but would not be ideal for the Ironman due to the fact that they trap in heat.
They are also not ideal for the run, and if you had to change clothing at T2, you’d probably lose all of the time you made up with the suit.

Photo: Velo News
You can see in the photos above that I’ll be wearing a black single piece tri-suit with no sleeves. It is made of spandex, so it is tight and won’t flap in the wind. It also cuts into the air decently. I’ll likely be supplementing that with arm warmers in the morning when the temperature will be in the 40-50s and then taking them off as it gets warmer.
Water bottle & fuel placement
There is a ton of debate around this one. The problem is lots of different people have done water bottle tests, but the situations are always a bit different that true racing conditions. Some companies make claims that X is the most efficient placement of water bottles and others state the exact opposite.
It turns out that they might both be right. Aerodynamics involve the flow of air around your entire bike & person. So sometimes doing X would hurt you if Y were true but help you if Y weren’t true.
It is very hard to test this stuff. There are wind tunnels, but I’m not a believer that those tests perfectly simulate riding conditions where leaning, climbing and pedaling all add considerations. In fact, some gear manufacturers test their parts separately, without taking into consideration the whole bike & rider.
Here is what I believe to be true about water bottle & fuel placement.
- Being dehydrated or underfuelled is much worse that any aero penalty. If you don’t drink enough, you won’t finish the race, which is much worse than finishing 5 minutes later because your water bottle created some extra drag. So avoid having your bottle placed in an annoying place so that you don’t use it often, or and awkward place that might result in dropping a bottle.
- Body position changes result int he biggest aero penalty, so getting out of your aero tuck to reach a water bottle in an inconvenient but aerodynamic place is much worse over the course of a race than the continual drag of a bottle in a slightly more convenient but less aerodynamic place.
- Between the arms is a great placement, it helps you cut into the wind and direct air elsewhere.
- Fewer bottles is better.
So what am I doing for water bottle placement?
Great question. I’ll have to let you know after my race because I’m still debating.
Here is what I’ve been practicing with though.

You can see I have three bottles on the bike.
The first bottle is an aerodynamically shaped bottle between the aero bars (handle bars). This one actually has two compartments on it along with quick fill lids. I’ve been training by using the larger of the two compartments for water and the smaller for an electrolyte mix. A week away from my race and I’m actually considering having my nutrition in the smaller one and refilling it periodically.
Here is the great part about this bottle. I can drink from it through those straws without changing my body position. It is also right in front of me so I’m constantly reminded of it. I actually have a bike computer that will beep at me every five miles as well to remind me to take a sip of each.
You can see that this bottle satisfies rules 1-3 above.
The second bottle is the one with the red lid on my down tube. This is where I usually keep my nutrition. I have to reach for it about every 15 minutes which violates principle #2 above. That is why I’ve been debating putting nutrition in the second compartment of the handlebar bottle. That way I could sip from that every 15 minutes and only have to refill it every two hours.
The third bottle is the one on the seat tube. I am not planning on using this during the race. I use it during training because I often need to bring a lot of water with me. During the race however there will be people handing out water bottles which I can use to refill my handle bar bottle. I am probably going to keep that cage their though just in case. If for any reason I needed to hold onto a bottle, it would be nice to have it there.
The fourth spot I am debating is right behind my seat. Some people have special holder attachments to keep water bottles back there, but I would just zip tie the cage that is holding the red bottle. The reason that placement is though of as more ideal is because your body is already blocking the wind up to that point. So rather than having a big bulge on your frame, you basically hide the bottle in the safe zone behind you.
The trouble with that is I’d have to reach for it. I haven’t practiced that much, so I’m nervous about making a change one week before my race.
I should mention that by using liquid nutrition, I have a huge advantage when it comes to aerodynamics. I can pack 2000 calories into a bottle and I might bring along an extra ‘flask’ of gel that I keep in the pocket on my back. If I were bringing less dense food, like bananas, I would need to find someplace to keep them. If I were bringing less convenient food like 23 packs of GU, (same caloric equivalent) I would need to store, reach and open each, which would result in body movement. Finally, if I depended on the course nutrition, I would have to go through every pit stop, often slowing to grab things or avoid other racers. I like my strategy here.
Gear placement
The next thing is where to put the gear you bring.
Lets start of by stating the obvious, less is better. I’ve reduced what I’m carrying on my bike to:
- spare tube
- 2 x CO2 canisters
- CO2 nozzle
- 2 x tire levers
- multi-tool
- pack of chamois creme for emergencies
Where does it all go? Look in the photo below and see if you can spot it.
Did you find it? Most of the items are in that little black pouch behind my handle bars. That is a safe zone for aerodynamics because my arms and water bottle will be breaking the wind. The spare tube is actually shoved under the seat in a zip-lock bag. You can faintly see it if you look closely.
Some people like having a bag under/behind the seat. I have one of those for training, when I tent to cary a bit more, but won’t need it for the race. Which is why I am debating moving a water bottle back there.
Helmet
Helmets are designed to do one primary thing. Protect your head if you crash.
After that, most helmets are designed for one of two different and competing secondary goals. Make you go fast or keep you cool.
My helmet is designed for the former, though there are a few ways I can adjust it to make it cooler on a hot day, though each of those sacrifices speed.
A helmet does two things with air as it passes.
First it cuts into it. My helmet has a smooth front with no vents. Because of that, all air will be directed around the helmet. That means that I won’t have the benefit of cooling. Some helmets have lots of vents in the front and are great for keeping you cool. That air that brushes bye your head though is creating drag.
Second, it redirects it. You can see from the image below that my aero helmet has a long protrusion that resembles that of a Death Star Trooper. That is designed to help direct the air around the helmet and to my back. In an ideal world there is no gap between the riders back and the helmet, thus creating perfect air flow.
The orange line below shows what we want the wind to do.
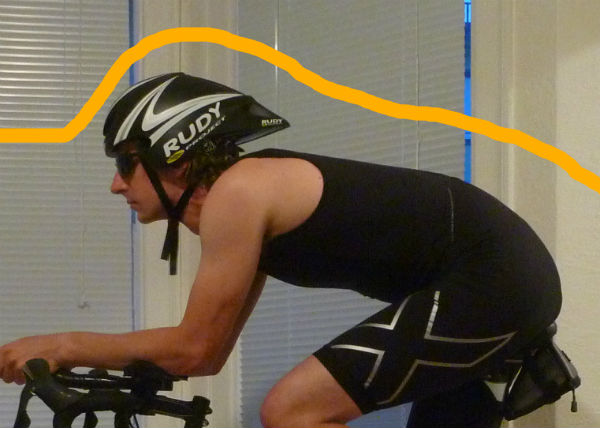
I have tweaked my form slightly since this picture was taken so that the gap between my helmet and back is smaller. It doesn’t touch, but it is pretty darn close.
Upgrading helmets is not the most cost efficient aero upgrade. The helmet I’m using costs $400 new and will probably save me 5 minutes of time. I didn’t have another bike helmet and have trained using a snowboard helmet which has a hugely inefficient visor on the front so I knew I needed to get something. Thankfully I found this one on craigslist for much less than retail.
Disc wheel
There are some studies showing that the turbulence created by air passing through the spokes of the back wheel isn’t good for aerodynamics. A product invented to help with that is a disc wheel.
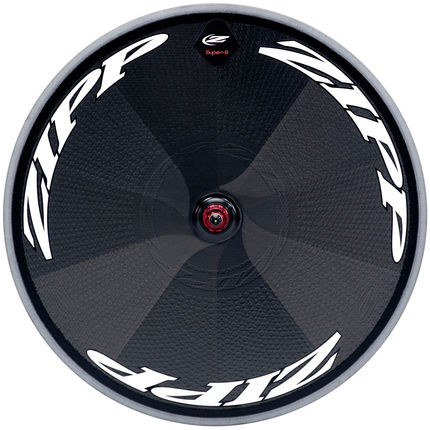
This particular wheel from Zipp retails for $2,400. Wow! That is more than twice as much as my bike cost.
A disc wheel could actually help on your front wheel as well, but it is usually unsafe to have one. If you are riding with side winds, a gust can push against these wheels. If you have a disc on your front wheel, the wind can turn your bike because the front wheel controls the steering. That might result in a crash. The rear wheel is typically safe because it doesn’t turn and you are sitting with your weight right above it which holds you in place.
I went with an alternative from a company called Wheel Builder. Take a look at the picture below and see if you can tell the difference.
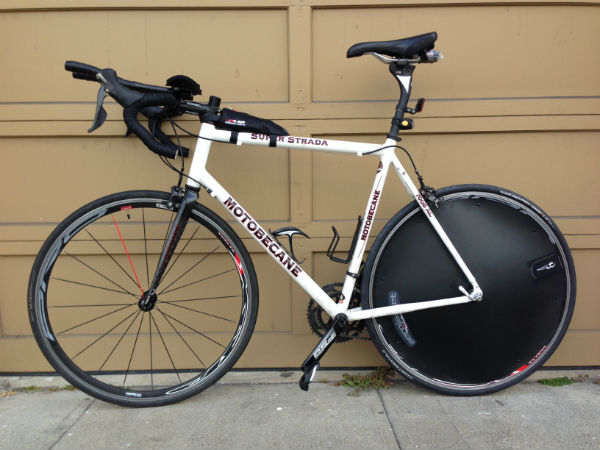
Can you tell the difference? Well, the wind can’t according to testing. Basically my wheel is a plastic cover that snaps on. It is a bit heavier than having a carbon wheel since I am carrying spokes, the cover & the fasteners – but remember, weight isn’t that big of a deal. Oh, and did I mention it costs less than 1/20 of the cost of that Zipp wheel.
Shaving your legs
Now we’re getting into the minutia.
Cyclists have been shaving their legs for a long time. The main reason they quote is that in the case of a crash, shaved legs don’t get torn up by the asphalt as much and tent to heal faster.
Specialized, a bike company, recently did tests though and concluded that there was also an aerodynamic advantage. Do I believe them? Well, their tests were on legs that weren’t moving, and I don’t plan on spending much time with my legs not moving, so I can’t say I’m fully bought in.
But I’ll tell you what. Last week I was riding when I saw a small gnat stuck in my leg hair despite the fact that I was going ~20mph. I realized that if I bug could get caught in my leg hair, so could air. The difference between smooth and hairy legs is probably about the same as the difference between clothing materials. As I mentioned above though, spandex & lycra are faster than say… wool, so I guess that means I’m shaving.
I’d never shaved my legs before. I feel like this was a cycling rite of passage.
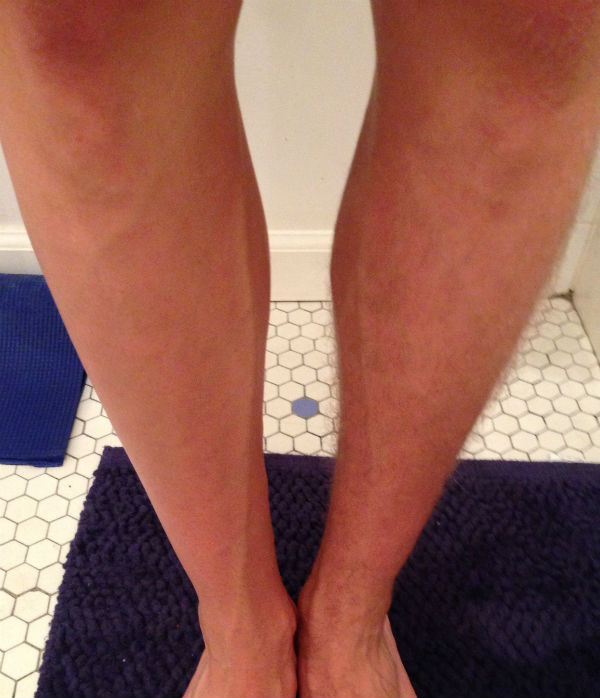
On a scale of one to Chewbacca, my legs might be a four. They actually don’t look quite as hairy as they are because the hair is light and about the same tone as my skin. I figured this would be quick – so I got started.

Turns out it wasn’t quick. I had to keep clearing hair out of the razor. My approach was a tub full of hot water and lots of shaving creme. The first pass took forever but then things got quicker. After about three passes I felt like they were actually smooth enough to make me faster.
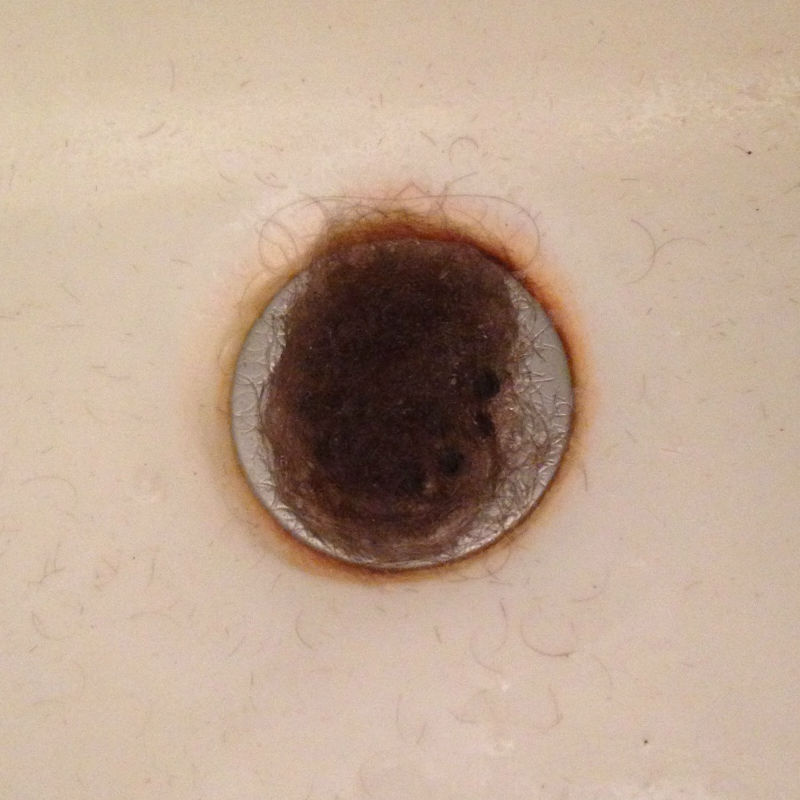
Here is the comparison.
And here is what was left in the tub from that one leg.
I suspect some advantage will also come from the mental aspect of this. Back in college I had a special pair of race socks I only used when racing. They were the same as the socks I trained in, but in better condition due to less use. The main advantage to them was that when I put them on, I knew it was go time. That was a clue to my body & mind that this was something special so treat it like such.
Aero Enhancement I am Intentionally Avoiding
I mentioned before that there are tons of product out there sold under the guise of making you more aerodynamic. I tried to only utilize those with real impact, paying attention to the cost/effect ratio.
The following are items I’ve intentionally passed on.
- Aero frame
- Behind the seat two-bottle holder
- Aero seat post
- Shoe covers
- Aero front wheel or three-spoke wheel
- Bullhorn handle bar
- Aero shaped water bottle for frame
What brand and model is your aerodynamic water bottles between your handle bars?
Profile Design is the name of the company. I used the two chamber version – the smaller one had my nutrition & the larger had water. I had to refill both multiple times obviously.